A little over two years ago, I solo swam 12.5 miles around the island of Key West. The preparation and training was grueling, the swim itself was challenging, but the overall experience was one of the most rewarding things I have ever been through.

Upon finishing my swim, I had grand intentions to maintain a long distance swim program as well as update my experiences about my Key West swim, but life got in the way and before long, my swimming workouts and my swim around Key West had become little more than distant memories.
Fast forward two years. I got an email the organizers of the Swim Around Key West saying that they were still looking for support kayakers to help solo swimmers, so it seemed like the perfect way to participate in an event I loved without committing to the year of training. As I can attest to first hand, a support kayaker is essential for the safety and progress of the swimmer. They are responsible for feeding the swimmer at designated intervals, navigating the course and keeping an eye out for other swimmers and boaters.
On the day of the swim, my swimmer and I confirmed some final details about navigation and feeding (every 30 minutes, alternating water and Gatorade with Gu energy gel packs). We made our final preparations: my swimmer slathering himself head to toe in Desitin zinc oxide while I secured all the things he or I would need for the next 6-7 hours onto my kayak.
Smather’s Beach- The Start
The swim begins in the water for both swimmers and kayakers. If you have never experienced an in-water start it has a different sort of frenzy compared to on-land starts. I think as a swimmer, I prefer starting in water because you can scope out the area and plan your course but as a kayaker it is rather stressful keeping an eye on your swimmer while also simultaneously not inadvertently hitting a swimmer with your kayak or paddle.


Mile 0.5- Mile 2- The Beginning
The race organizers typically advise that kayakers and swimmers should reunite no later than Mile 1. Both when I swam this two years ago and this most recent time when I was a kayaker, it was pretty easy reconnecting after the initial start. Should you be less lucky, about half a mile after the start stands White Street Pier, which sticks pretty far out into the sea, making it a very obvious landmark and helpful place to reconnect.
From White Street Pier you should sight for the large white dish at the left side of the island (This is Mile 2). What they don’t tell you is that you should try and move closer inland once you pass the pier so that you don’t run the risk of moving too far out too sea and tire yourself out prematurely.


Mile 3-4- Rounding the Island
Mile 3 features the first realization (if it hasn’t already sunk in) that you are in fact swimming around an island because this is where you actually experience the first change in direction as you bank around the first corner of the island. At the sandy beach of Mile 3, the water can become rather shallow so it is recommended to not get too close to shore.


Mile 5- Fleming Key Bridge
Almost any swimmer that has swam around Key West will typically remember Fleming Key Bridge at Mile 5 as one of the highlights of the swim. Not only does it mean that you are nearing the halfway point of the swim, it is also where you will experience some of the fastest currents that push you through the bridge at top speeds that will make you feel like a torpedo. As a kayaker, I just let my swimmer go. Staying close to them but making sure they had full advantage of the current.

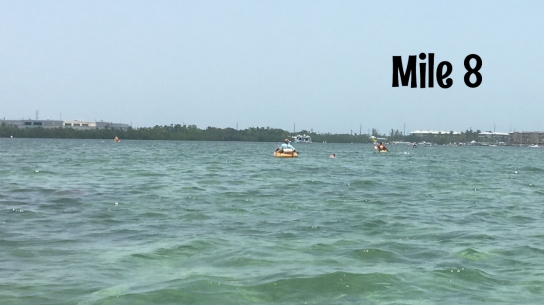
Mile 6-8- The Backside of the Island
The good news is that as you swim across the Mooring Field of Mile 6 and around Dredgers Key of Mile 7, you can enjoy the realization that you are past the halfway point. The bad news is this is where some of the more challenging navigation takes place.
Mile 6 is one of the few parts of the swim where you will not see the bottom but the bigger challenge for both swimmer and kayaker is navigating through the rows of sailboats. Through almost the entirety of this portion of the swim (Mile 6-8), the kayaker needs to do most if not all of the sighting to keep on course. Mile 8 is particularly challenging because you swim through open water without a clear visual of where to go next.


Mile 9-10- Cow Key Bridge and Channel
At Cow Key Bridge, another push from the current helps move you along as the swimmer. Upon making your way through the bridge and continuing through Cow Key Channel, this is where you will encounter by far the most jet ski and boating traffic of the day. You may also experience extremely shallow water. We found that by swimming a bit further to the left it kept my swimmer away from sand bars that creep up around Mile 10.


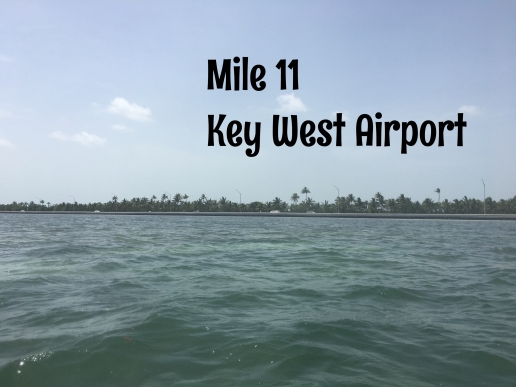
Mile 11- The Home Stretch!
By Mile 11, you want nothing more than to stop swimming/stop kayaking and to be able to eat a cheese burger. That last mile and a half is one of the hardest parts of the swim for one, because your body and brain is tired but also because as you bank the final turn of the island and swim parallel to the Key West Airport, this is where you may feel some current pushing against you, forcing you to work harder so you can make one final push home.
Mile 12- Return to Smathers Beach
You know without a shadow of the doubt that you are close to the end when you see the 10 final pillars that stand between you and the end of the swim. These pillars mark the last 1/2 mile (give or take) and are an amazing sight to see, but make sure you pace yourself so that you don’t run out of gas before getting home.
Next?
I am really glad that I made it back to Key West and was able to help a swimmer complete their swim. It reinvigorated my love for swimming and has motivated me to get back into a regular swimming schedule. Will this propel me into training for another Key West swim? I would love to say yes, but it is hard to commit to that much training and preparation. I hope to make it back into the briny sea water again, but only time will tell…

 4. If Something Isn’t Working, Switch it Up… With my outdoor pool schedule not meeting my needs by December, I found a deal with a network of indoor gyms and started swimming at LA Fitness. With the new location, it gave me a renewed energy for my swim workouts.
 5. Research. When I started my swim training in July, I had no real sense of any of the